A tiny crochet pumpkin, no bigger than your thumb, brings a smile even on the spookiest of nights. These little gourds are surprisingly quick to make and perfect for adding a festive touch to your keys, backpack, or even as a charming little gift. They capture that delightful blend of cute and spooky that Halloween is all about.
This pattern uses basic stitches worked in the round, making it a great project for beginners or anyone looking for a fast, fun make. You’ll learn how to create a small, solid fabric that holds its shape well, perfect for stuffing. We’ll cover how to shape the pumpkin, add a cute stem, and even attach a keychain loop so you can take your handmade Halloween cheer with you everywhere.
Whether you’re decking out your own accessories or whipping up a batch for party favors, these mini pumpkins are sure to be a hit. Grab your yarn and hook, and let’s make some adorable spooky decor!
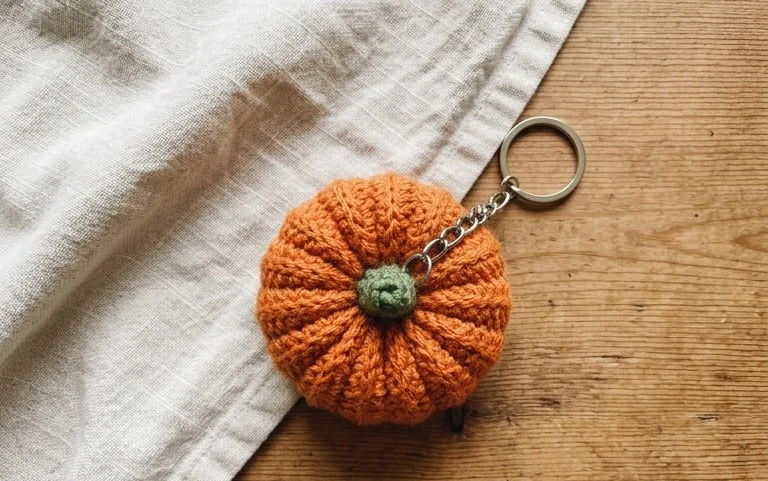
The Adorable & Eerie Halloween Pumpkin Keychain
A little crochet pumpkin, no bigger than your thumb, brings a smile even on the spookiest of nights. These tiny gourds are surprisingly quick to make and perfect for adding a festive touch to your keys, backpack, or even as a charming little gift. They capture that delightful blend of cute and spooky that Halloween is all about.
Yarn and Hook Recommendations
For these mini pumpkins, you want a yarn that has a bit of body but isn’t too bulky. Worsted weight yarn is your best friend here. Acrylic yarn is a great choice because it’s durable, easy to wash, and comes in a fantastic range of colors. For that classic pumpkin look, I recommend shades like bright orange, deep rust, or even a burnt sienna. For the stem, a simple brown or a dark green works beautifully. You could even experiment with variegated yarns for a unique mottled effect.
When it comes to hooks, a size G/6 (4.0 mm) or H/8 (5.0 mm) crochet hook usually works well with worsted weight yarn for amigurumi-style projects like this. The key is to crochet tightly enough so that your stitches create a solid fabric with no holes. This prevents your stuffing from peeking through. If you find your stitches are too loose, try going down a hook size. Conversely, if it feels too stiff and hard to work with, try a size up.
Essential Stitch Techniques
This pattern relies on a few fundamental crochet stitches that are easy to learn and master. You’ll be working primarily in the round, which gives your pumpkin its lovely shape. Here are the key techniques you’ll use:
- Magic Ring (or Magic Circle): This is the secret to creating a tight, neat center for your amigurumi. It allows you to start with a closed loop and then pull it tight to cinch the opening shut.
- Single Crochet (sc): This is the workhorse stitch for amigurumi. It creates a dense fabric perfect for stuffing.
- Increase (inc): To make your pumpkin grow, you’ll work two single crochets into the same stitch. This is how you increase the number of stitches in a round.
- Decrease (dec): To shape the pumpkin and close it off, you’ll work a decrease, typically an invisible decrease. This involves crocheting into the front loops of two stitches, creating a smooth transition.
- Slip Stitch (sl st): Used to join rounds and finish off your work.
Don’t worry if you’re new to any of these. There are countless helpful tutorials online demonstrating each technique. Practicing them a few times on a swatch will build your confidence.
Tips for Beginners
If you’re just starting out with crochet, these little pumpkins are an excellent project to build your skills. Here are some tips to make your journey smoother:
- Count your stitches: This is probably the most important tip for amigurumi. Always count your stitches at the end of each round to ensure you haven’t accidentally added or missed any. This will save you from having a lopsided pumpkin.
- Use a stitch marker: Since you’re working in continuous rounds, it’s easy to lose track of where a round begins and ends. Place a stitch marker in the first stitch of each round to keep you on track.
- Stuffing is key: Don’t be shy with the stuffing! Stuff your pumpkin firmly but not so tight that you stretch your stitches. You want it to have a nice, round shape. Polyester fiberfill is the standard choice.
- Tension consistency: Try to maintain an even tension throughout your work. This will make your stitches look uniform and professional. If you notice your fabric is too loose in some areas and too tight in others, take a moment to adjust your grip and yarn tension.
- Weave in ends securely: When you finish, make sure to weave in your yarn tails thoroughly. This prevents your work from unraveling.
Customizing Your Pumpkins
The beauty of crochet is its endless potential for customization. These pumpkins are a perfect canvas for your creativity!
- Colors: Beyond the classic orange, try different shades of yellow, green, or even purple for a more whimsical pumpkin. You could make a whole patch of uniquely colored pumpkins! For a “ghostly” pumpkin, use white yarn.
- Sizes: The size of your pumpkin is determined by your hook size and yarn weight. Using a bulkier yarn and a larger hook will result in a bigger pumpkin. Conversely, a finer yarn and a smaller hook will give you a miniature pumpkin. You can even adjust the number of increase and decrease rounds to make them taller or flatter.
- Faces: Instead of a crochet stem, you can embroider a face onto your pumpkin using black embroidery floss. Little French knots for eyes and a straight stitch for a mouth can create a friendly or spooky expression. You could also add tiny embroidered triangles for a classic jack-o’-lantern look.
- Stems: Experiment with different stem shapes. You could make a longer, curlier stem or add a small leaf detail. Adding a loop to the stem makes it even easier to hang as a keychain.
Caring for Your Crochet Pumpkin
Crochet items, especially those made with acrylic yarn, are generally quite easy to care for. For your pumpkin keychain, hand washing is usually the best approach to maintain its shape and color.
- Fill a small bowl with cool water and a tiny amount of mild detergent.
- Gently swish the pumpkin in the soapy water, paying attention to any soiled areas.
- Rinse thoroughly with clean, cool water until all soap residue is gone.
- Gently squeeze out excess water – do not wring, as this can distort the shape.
- Lay the pumpkin flat on a clean, dry towel and reshape it as needed.
- Allow it to air dry completely. Avoid direct sunlight, which can fade colors over time.
If you’ve used other materials like safety eyes, be sure to check their care instructions as well, though generally, they are quite durable.
Project Ideas
These little pumpkins are incredibly versatile. Beyond being a simple keychain, consider these ideas:
- Halloween Garland: Make several pumpkins and string them together with yarn or twine to create a charming Halloween garland for your mantelpiece or window.
- Gift Toppers: Attach a pumpkin to the ribbon of a gift for an extra festive touch.
- Desk Buddies: Place a few on your desk or windowsill for a cheerful autumn decoration.
- Party Favors: They make delightful and inexpensive party favors for a Halloween get-together.
- Doll Accessories: If you crochet dolls, these tiny pumpkins are the perfect accessory for them to hold.
- Bowl Fillers: Fill a decorative bowl with an assortment of these crochet pumpkins for a cozy autumn display.
With their simple construction and delightful results, these crochet pumpkin keychains are sure to become a staple in your autumn crafting repertoire.
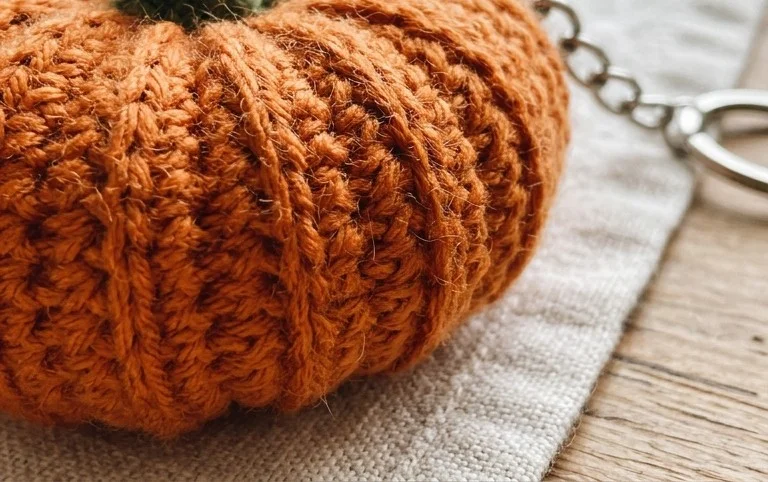
You’ve just made your own adorable and spooky Halloween pumpkin keychain! These little guys are so satisfying to create, and they add such a fun, handmade touch to everyday items. Don’t be afraid to play with different yarn colors or even add a tiny embroidered face for an extra touch of personality. Imagine a whole bunch of these in different shades of orange and green!
If you enjoyed making this project, I hope you’ll share a picture of your finished pumpkin keychain on social media – I’d love to see it! And be sure to check out more free crochet patterns here on the blog for more crafty fun.