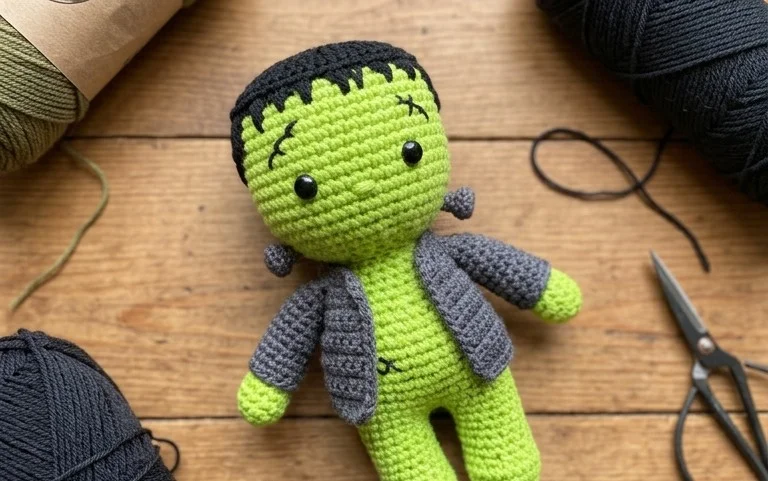
The classic green monster with stitches and bolts is a familiar face around Halloween. Bringing him to life with yarn and a crochet hook makes for a wonderfully quirky decoration or a huggable friend. This pattern is designed to guide you through making your very own Frankenstein’s monster, piece by piece. It’s a great project if you’re looking to practice your single crochet and increases, or if you just want a fun, themed make. You’ll end up with a sturdy, lovable creature perfect for setting on a shelf or giving as a special handmade gift.
We’ll walk through creating the head, body, and limbs separately, then how to assemble them. You’ll learn how to create his signature stitches, his square head, and those iconic neck bolts. Even if you’ve only just learned to crochet a magic ring, you can tackle this project. Get your dark green yarn ready; it’s time to build a friendly monster!
Frankenstein Crochet: Crafting a Classic Monster
The familiar silhouette of Frankenstein’s monster, with his bolts and stitches, has been a Halloween staple for decades. Translating this iconic figure into a cuddly crochet creation brings a touch of quirky charm to any home. This pattern lets you bring the friendly monster to life, stitch by stitch. It’s a rewarding project that’s perfect for practicing basic crochet skills and creating a unique decorative piece or a treasured toy.
Yarn and Hook Recommendations: Building Your Monster
Choosing the right yarn and hook is the first step to a successful Frankenstein. For a sturdy, yet huggable monster, a medium-weight (worsted weight) acrylic yarn is your best bet. It’s durable, easy to wash, and comes in a fantastic range of colors.
For the main body, you’ll want a dark green. Think of a deep forest green or an olive green. For the accents – the bolts, the scars, and maybe even some hair – you’ll need black and a metallic silver or grey. A touch of white for the eyes adds a classic look.
- Main Body: Worsted weight acrylic yarn in dark green. About 100-150 yards should be plenty.
- Accents: Smaller amounts of black, silver/grey, and white.
- Hook Size: A 5mm (H-8) crochet hook is generally a good starting point for worsted weight yarn. This size creates a nice, firm fabric without being too stiff. If your stitches feel too loose, try going down to a 4.5mm (G-6) hook. If they seem too tight, a 5.5mm (I-9) might be better. The goal is a fabric that doesn’t let the stuffing show through.
Stitch Techniques Used: The Building Blocks
This pattern relies on some fundamental crochet stitches that are essential for most amigurumi projects. Don’t worry if you’re new to some of them; they’re straightforward to learn.
- Magic Ring (or Adjustable Ring): This is the foundation for most stuffed crochet items. It creates a tight, seamless starting circle, preventing any gaps where stuffing might escape. You can find many video tutorials online that show you exactly how to make one – it’s much easier than it sounds!
- Single Crochet (sc): This is your workhorse stitch. It’s a dense stitch that builds a solid fabric, perfect for amigurumi. You’ll be working most of your stitches in this.
- Increase (inc): To make your project grow wider, you’ll use increases. This means working two single crochet stitches into the same stitch from the previous round. This is how you create the spherical or rounded shapes of the head, body, and limbs.
- Decrease (dec): To make your project narrower or close it off, you’ll use decreases. The most common type for amigurumi is the invisible decrease, where you work through the front loops of two stitches to create one. This looks neater than a standard decrease.
- Slip Stitch (sl st): This stitch is used to join rounds or to move your yarn without adding height.
- Half Double Crochet (hdc) / Double Crochet (dc): While single crochet is dominant, some patterns might use hdc or dc for specific textures or larger elements, like perhaps a collar. For this Frankenstein, we’ll primarily stick to single crochet for the main parts to keep it simple and consistent.
Tips for Beginners: Making Monster Magic Easy
If you’re just starting your crochet journey, this Frankenstein is a fantastic project to tackle. It’s forgiving and the result is so charming you’ll be proud of your work.
- Use a Stitch Marker: Always use a stitch marker (a small plastic clip or a piece of scrap yarn) to mark the beginning of each round. This is essential for amigurumi as you’re often working in continuous rounds, and it’s easy to lose track of where you are.
- Stuffing is Key: Don’t be shy with the stuffing! Stuff your pieces firmly as you go, especially the head and body. This gives your monster shape and prevents it from looking floppy. You want it to be huggable, not deflated.
- Sewing Pieces Together: Take your time when sewing the limbs and head to the body. Using a yarn needle and making sure your pieces are aligned correctly will make a big difference to the finished look. You can even use a few pins to hold the pieces in place before you start sewing.
- Read Ahead: Before you start a new section, read through the instructions for that part. This helps you understand the flow of the pattern.
- Practice Stitches: If you’re unsure about a specific stitch, practice it on a small swatch before you start working on your actual monster pieces.
How to Customize: Your Monster, Your Way
The beauty of crochet is its endless potential for customization. You can make your Frankenstein truly unique.
- Color Variations: While the classic green is traditional, why not try a purple Frankenstein? Or a fiery orange for a spooky twist? You can also change the color of the stitches. Perhaps white stitches on a black body, or even red stitches for a more dramatic effect.
- Size Adjustments: To make your monster bigger, simply use a thicker yarn and a corresponding larger hook. Conversely, for a smaller, more pocket-sized monster, use a lighter weight yarn (like sport or DK weight) and a smaller hook. Be aware that changing yarn weight will affect the number of stitches and rounds needed for each piece.
- Facial Features: The classic stitched mouth can be done with embroidery floss. You can also add button eyes instead of crocheted ones for a different look. Experiment with different scar placements or add stitches to the cheeks.
- Accessories: Want your Frankenstein to be extra dapper? Crochet a little bow tie, a tiny hat, or even a miniature lab coat.
Care Instructions: Keeping Your Monster Spooky-Fresh
Crocheted items are generally quite durable, but a little care will ensure your Frankenstein lasts for many Halloweens to come.
- Washing: For acrylic yarns, a gentle machine wash on a cool or warm cycle is usually fine. It’s always best to place your crocheted item inside a mesh laundry bag to protect it from snagging.
- Drying: Never put your crocheted items in the dryer on high heat, as this can melt acrylic fibers and warp the shape. Instead, gently squeeze out excess water (don’t wring it!) and lay it flat to air dry. Reshape it while it’s still damp.
- Spot Cleaning: For small spills or marks, spot cleaning with a damp cloth and a tiny bit of mild soap is often sufficient.
Project Ideas: Beyond the Basic Monster
This Frankenstein pattern is a fantastic starting point for a variety of spooky projects.
- Halloween Decor: Create a whole Frankenstein family or place him amongst other Halloween-themed crocheted items like pumpkins, ghosts, and black cats for a festive display.
- A Special Gift: This makes a wonderfully personal and handmade gift for anyone who loves monsters or Halloween.
- Amigurumi Collection: If you enjoy making stuffed creatures, add Frankenstein to your growing collection of amigurumi friends.
- Frankenstein Garland: Crochet several smaller Frankenstein heads and string them together to make a fun garland for your mantelpiece or windows.
- Frankenstein Pouch: Make a slightly larger Frankenstein and add a zipper to turn it into a quirky coin purse or small bag.
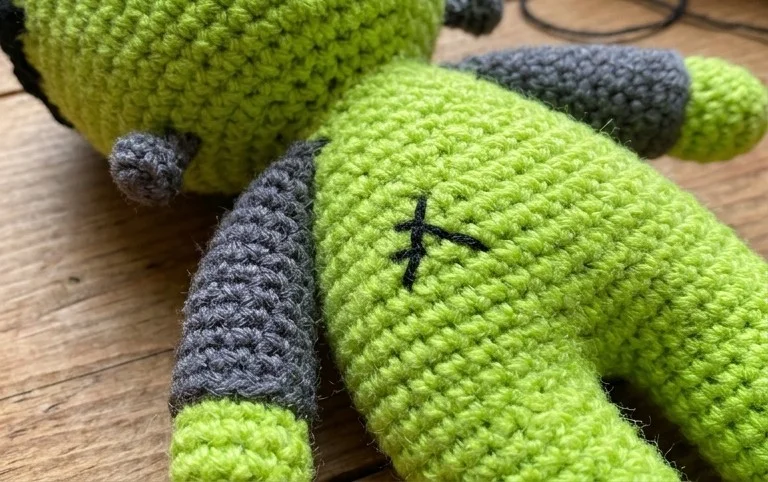
There you have it – your very own crochet Frankenstein’s monster! I hope you enjoyed stitching him up. Don’t forget to share a picture of your finished monster on social media using the hashtag #FrankensteinCrochet so we can all admire your spooky creation. You could try using a different color for the body, or maybe add some extra stitching details for a more complex look. Perhaps a miniature bride of Frankenstein to go with him?
If you had fun with this pattern, there are plenty more fun amigurumi projects waiting for you. Keep your hooks busy and happy crocheting!