The crunch of fallen leaves underfoot and the scent of cinnamon in the air always make me reach for my yarn. There’s nothing quite like crafting a little piece of autumn, and these amigurumi pumpkins are just the thing. They turn out plump and perfectly round, like miniature gourds you can hold in your hand. They’re worked up in one piece, so there are no seams to worry about, making them surprisingly quick to crochet. Whether you’re just starting out with crochet or you’ve been hooking for years, you’ll find these patterns a joy to make. They’re fantastic for beginners learning to crochet in the round, and they make adorable decorations for your home – think a cozy cluster on a shelf or a few scattered on a windowsill. Plus, they’re a charming handmade gift for friends and family as the weather cools. In this guide, we’ll cover yarn and hook suggestions, essential stitches, and point you towards some great free and paid pattern options so you can start creating your own pumpkin patch.
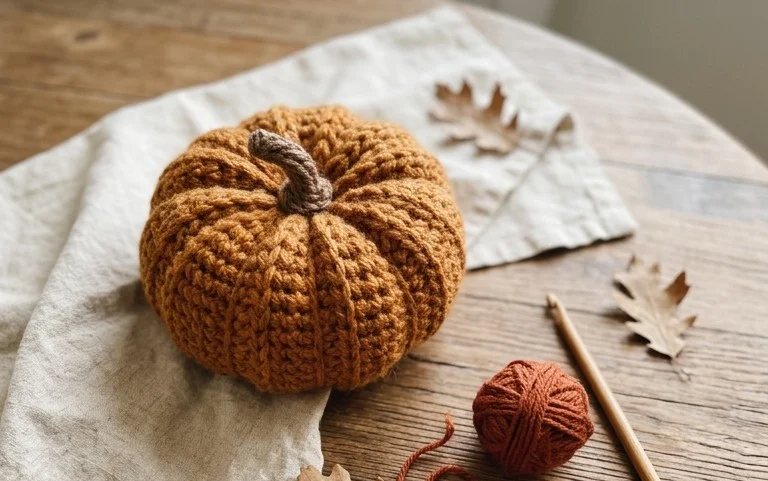
Amigurumi Pumpkin Crochet Patterns: Your Guide to Cozy Creations
The warm, inviting texture of crochet is perfect for celebrating autumn, and what embodies fall more than a pumpkin? These little amigurumi pumpkins, whether you snag a free pattern or opt for a paid, more detailed one, are surprisingly simple to make and incredibly satisfying. They’re worked in the round, creating seamless, plump shapes that look just like miniature gourds. You can have a whole patch of them sitting on your mantle in no time.
Yarn and Hook Recommendations
For these little pumpkins, you want a yarn that has a bit of substance and holds its shape well. Worsted weight acrylic yarn is a fantastic choice. It’s durable, easy to care for, and comes in a huge range of colors, including all the perfect pumpkin shades. Brands like Red Heart Super Saver, Yarn Bee Soft Secret, or Premier Anti-Pilling Everyday are readily available and work beautifully.
For the hook, a size G (4.0 mm) or H (5.0 mm) crochet hook is usually recommended. This size creates a nice, tight fabric that prevents your stuffing from peeking through. Always check the specific pattern you’re using, as sometimes a slightly different gauge can be achieved with a different hook size. It’s also helpful to have a tapestry needle for weaving in ends and a pair of sharp scissors.
Essential Crochet Techniques
These amigurumi pumpkins primarily use a few fundamental crochet stitches, making them accessible even for those who are relatively new to crochet.
- Magic Ring (or Magic Circle): This is the foundation for most amigurumi. It creates a tight, adjustable starting circle that’s essential for a seamless look. If you’re a beginner, practicing this stitch a few times before starting your pumpkin will make a big difference.
- Single Crochet (sc): This is your workhorse stitch for amigurumi. It creates a dense fabric that’s perfect for stuffed items.
- Increase (inc): This means working two single crochet stitches into the same stitch. It’s how you’ll gradually widen your pumpkin.
- Decrease (dec): This is usually done as an invisible decrease. You’ll typically work the decrease by inserting your hook into the front loop only of the next two stitches, yarning over, and pulling through both loops, then yarning over again and pulling through the remaining two loops on your hook. This is key to shaping the top and bottom of your pumpkin.
- Slip Stitch (sl st): Used to join rounds and finish off your work.
Tips for Beginners
If you’re just starting with amigurumi, these pumpkins are a great project to build your confidence.
- Count your stitches: This is probably the most important tip. Amigurumi relies on precise stitch counts for shaping. Use stitch markers to mark the beginning of your rounds, especially in the early stages.
- Stuff as you go: Don’t wait until the very end to stuff your pumpkin. Add stuffing gradually as you crochet. This helps you achieve an even, smooth shape and prevents the stuffing from bunching up.
- Tension matters: Try to keep your tension consistent. Too loose, and your stuffing will show. Too tight, and it can be difficult to work your stitches. Practice makes perfect!
- Don’t be afraid to frog: If you make a mistake, it’s okay to unravel your work (this is called “frogging” in crochet). It’s better to fix it early on than to have a wonky pumpkin.
- Practice the Magic Ring: Seriously, spend a little time practicing just the magic ring. Once you’ve got that down, the rest of the pattern will feel much easier.
Customizing Your Pumpkins
The beauty of crochet is the endless possibilities for customization. These pumpkins are no exception!
Colors
While classic orange is wonderful, don’t stop there!
- Shades of Orange: Experiment with different shades of orange, from deep rust to bright tangerine.
- Variegated Yarns: A variegated yarn that includes orange, brown, and even a touch of green can create a beautifully unique pumpkin.
- Autumn Hues: Think about other fall colors! A creamy white pumpkin, a deep burgundy one, or even a muted green can look stunning.
- Speckled Yarns: For a more realistic speckled look, find yarns with small flecks of contrasting colors.
Sizes
Most amigurumi patterns are easily adjustable for size.
- Larger Pumpkins: To make a larger pumpkin, simply continue working more increase rounds, following the pattern’s logic, until you reach your desired circumference before starting the decrease rounds. You’ll need more stuffing for bigger pumpkins.
- Smaller Pumpkins: To make a smaller pumpkin, stop the increase rounds one or two rounds earlier than the pattern specifies before beginning the decrease rounds.
Adding Stems and Leaves
No pumpkin is complete without a stem and maybe a little leaf!
- Crocheted Stems: You can easily crochet a simple stem by working a few rows of single crochet in brown or green yarn in a small tube. Attach it securely to the top.
- Felt or Fabric Stems: Cut a simple stem shape from brown or green felt or fabric and glue or stitch it onto the top.
- Crocheted Leaves: Many patterns will include instructions for a simple crocheted leaf, or you can find separate leaf patterns online.
Caring for Your Finished Pumpkins
These amigurumi pumpkins are surprisingly durable, but a little care will keep them looking their best.
- Spot Clean: For minor dirt or dust, gently spot clean with a damp cloth and mild soap. Avoid soaking the pumpkin, as the stuffing can take a long time to dry.
- Gentle Wash: If a more thorough cleaning is needed, place the pumpkin in a mesh laundry bag and wash on a gentle cycle with cold water and a mild detergent.
- Air Dry: Always air dry your amigurumi pumpkins. Lay them flat on a towel, reshaping them gently as needed, and turn them periodically. Avoid using a machine dryer, as the heat can damage the yarn and stuffing.
- Fluffing: Over time, the stuffing might compress. You can gently fluff the pumpkin with your fingers to restore its shape.
Project Ideas for Your Amigurumi Pumpkins
Once you’ve made a few pumpkins, you’ll quickly find yourself wanting to make more! They’re incredibly versatile.
- Home Decor: Arrange them on your mantle, coffee table, or windowsill for a charming autumn display. Group different sizes and colors together for visual interest.
- Gifts: They make thoughtful handmade gifts for friends, family, teachers, or neighbors. Attach a small tag with care instructions.
- Bowl Fillers: Fill a decorative bowl or basket with a collection of these little pumpkins for an instant festive touch.
- Garlands: String them together with some coordinating ribbon or yarn to create a sweet autumn garland.
- Appliqués: For larger projects, individual pumpkins can be sewn onto blankets, bags, or sweaters as decorative appliqués.
- Playtime: For younger children, these soft pumpkins can be a fun and safe addition to pretend play.
Whether you’re looking for a quick weekend project or a way to add a cozy, handmade touch to your fall décor, these amigurumi pumpkins are a perfect choice. Happy crocheting!
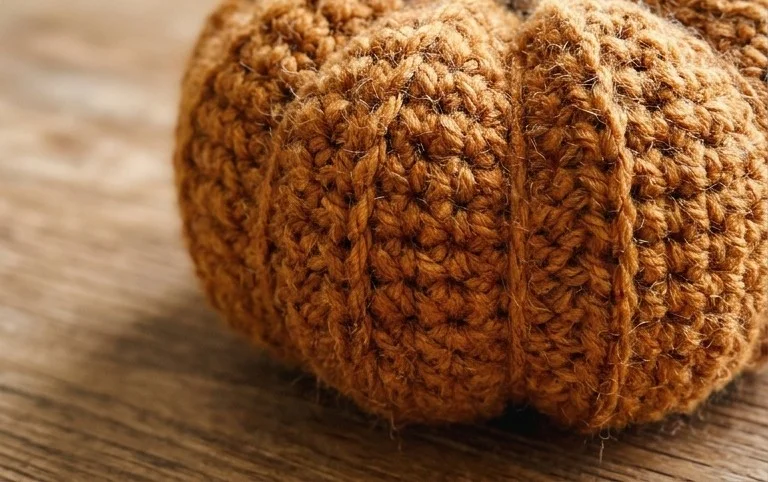
See? Crocheting a little patch of amigurumi pumpkins is straightforward and so rewarding. You’ve got the basic idea now, from picking the right yarn to understanding the core stitches. Don’t be afraid to play around with different colors – maybe a pale ghost pumpkin or a deep, dark green one for variety. You could even add a little stem and leaf made from felt or embroidery floss. We’d love to see your finished pumpkins! Tag us on social media so we can all admire your work. If you enjoyed making these, be sure to check out our other seasonal crochet patterns for more crafty inspiration throughout the year.