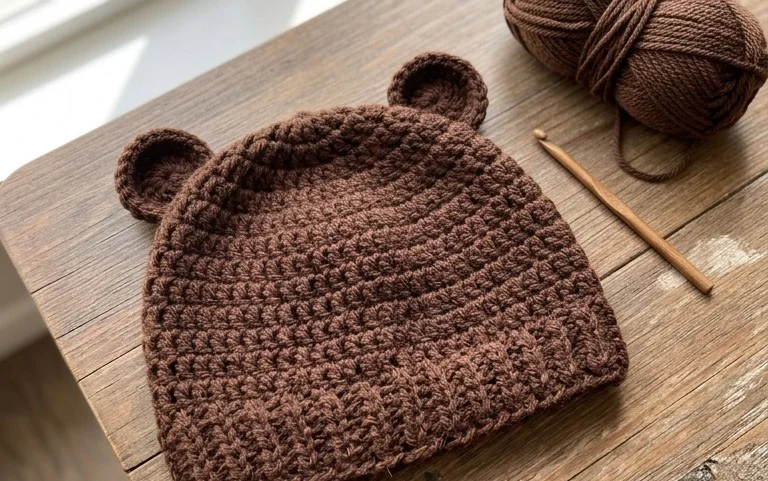
This bear beanie starts with a simple round of single crochet, just like many other hats, but soon you’ll see the cute bear ears taking shape. It’s a project that uses basic stitches and comes together quickly, making it a great option when you need a last-minute gift or just want to make something fun. Imagine a little one wearing this, with the sweet bear ears peeking over their head. It’s perfect for anyone starting out with crochet, offering a clear path to a finished item that looks impressive. This pattern is also ideal for seasoned crocheters looking for a straightforward, enjoyable project. You’ll learn how to shape the hat, attach the ears securely, and add a simple nose detail.
Bear-ly Scary: A Bear Beanie Free Crochet Pattern
This bear beanie is a cozy and cute addition to any little one’s wardrobe, or even a fun accessory for adults! The simple design makes it perfect for crocheters of all skill levels, and the result is a charming hat that looks like a friendly bear peeking out. It’s the kind of project that brings a smile to your face as you make it, knowing the happy recipient will love it just as much.
Yarn and Hook Recommendations
For this Bear Beanie, you’ll want a yarn that has a good stitch definition and a bit of warmth. Worsted weight yarn is the go-to for this pattern. It’s readily available and works up at a nice pace, not too thin that it takes ages, and not too thick that it becomes bulky and stiff. Acrylic yarns are fantastic for hats because they’re durable, washable, and come in a rainbow of colors. Consider brands like Red Heart Super Saver, Lily Sugar ‘n Cream, or Bernat Premium. If you prefer natural fibers, a good quality wool or a wool blend will also work beautifully, offering extra warmth.
The recommended hook size for this pattern is typically a 5.0 mm (H-8) crochet hook. This size works well with most worsted weight yarns to create a fabric that isn’t too dense (which can make the hat stiff and hot) but also not too loose (which can leave gaps and make it less warm). Always check your yarn label; it will usually suggest a hook size, and it’s a good starting point. If you find your fabric is too tight, try going up a hook size (like a 5.5 mm or I-9). If it’s too loose, go down a size.
Essential Stitch Techniques
The beauty of the Bear Beanie lies in its simplicity, relying on a few fundamental crochet stitches. You’ll primarily be working with:
- Single Crochet (sc): This is the most basic stitch and forms a dense, sturdy fabric. It’s worked by inserting your hook into a stitch, yarning over, pulling up a loop, yarning over again, and pulling through both loops.
- Half Double Crochet (hdc): A bit taller than single crochet, the half double crochet adds a lovely texture and works up a little faster. You yarn over before inserting your hook, pull up a loop, yarn over, and pull through all three loops on your hook.
- Double Crochet (dc): This stitch creates a taller fabric and works up very quickly. You’ll yarn over, insert your hook, yarn over, pull up a loop, yarn over, pull through two loops, yarn over, and pull through the remaining two loops.
- Magic Ring (or Adjustable Ring): This is used to create a perfectly closed circle for the top of the hat, eliminating any hole you might get with starting with chain stitches. It’s a technique where you create a loop of yarn that you can then pull tight.
- Working in the Round: The hat is constructed by crocheting in continuous rounds, joining each round with a slip stitch and then chaining to begin the next.
- Increasing: To shape the beanie from a flat circle into a dome, you’ll need to increase stitches evenly within certain rounds. This usually involves working two stitches into the same stitch from the previous round.
Tips for Beginner Crocheters
If you’re new to crochet, don’t be intimidated by this pattern! It’s designed to be accessible. Here are a few tips to help you along:
- Practice the basic stitches first. Before you even start the hat, make a few small swatches of single crochet, half double crochet, and double crochet. Get comfortable with the tension and how the stitches look and feel.
- Learn the Magic Ring. This can be a little tricky at first, but there are tons of great video tutorials online that show you exactly how to do it. It makes a much neater start to your hat than a chain loop.
- Use a stitch marker. When working in the round, it’s easy to lose track of where your round begins. Place a stitch marker in the first stitch of each round.
- Count your stitches. This is so important! Especially when you’re increasing or decreasing. If you don’t have the right number of stitches, your hat won’t be the correct size or shape.
- Don’t be afraid to frog it. “Frogging” is crochet lingo for ripping out your stitches. If you make a mistake and notice it early, it’s much easier to pull out a few rows than to try and fix a bigger problem later.
- Tension is key. Try to maintain consistent tension throughout your project. This means not crocheting too tightly or too loosely. Your yarn and hook choice will influence this, but also your own hand.
Customizing Your Bear Beanie
This pattern is a fantastic base for customization. Here’s how you can make it your own:
- Colors: The most obvious way to customize is with colors! You can stick to classic brown for a traditional bear, or go for playful pinks, blues, grays, or even bright, unexpected colors. You could also use a variegated yarn for a unique look. Consider using a different color for the ears or the nose.
- Sizes: The pattern can be easily adjusted for different sizes. To make it larger, simply add more rounds of single crochet (or your main fabric stitch) after the initial increases for the crown have been completed, until the flat circle measures the desired circumference for the head size. For smaller sizes, you might stop the increase rounds earlier. Always measure around the head of the intended wearer and compare it to the diameter of your flat circle. Aim for the flat circle to be about 1-2 inches smaller than the head circumference to ensure a snug fit.
- Ear Shape: The pattern likely includes simple rounded ears. You can experiment with making them more pointed or even adding a contrasting color to the inside of the ear for a different effect.
- Facial Features: While the pattern might suggest specific ways to add eyes and a nose (often by crocheting small circles or using embroidery), you can get creative here. You could embroider a small smile, add safety eyes for a more polished look, or even felt some features on.
Care Instructions for Your Finished Beanie
Taking care of your crochet projects ensures they last for years. For acrylic yarns, which are common for this hat:
- Washing: Machine wash on a gentle cycle with cold water. You can place the beanie inside a mesh laundry bag to protect it.
- Drying: Lay the beanie flat to air dry. Avoid putting it in the dryer, as the heat can melt or damage acrylic fibers, and it can also cause the hat to lose its shape. Gently reshape it while damp.
- For Wool or Wool Blends: If you used wool, it’s best to hand wash in cold water with a wool-specific detergent. Gently squeeze out excess water (don’t wring!) and lay flat to dry, reshaped.
Project Ideas
This bear beanie is wonderful as a standalone gift, but here are some other ideas to pair it with or consider:
- Matching Set: Crochet a matching scarf or a pair of mittens in the same color or similar stitch pattern.
- Baby Shower Gift: This is a perfect addition to a baby shower gift basket, especially if you include a soft baby blanket.
- Costume Accessory: It makes an adorable and simple costume for a woodland creature theme, or for Halloween.
- Photoprop: The cute bear ears are perfect for newborn or baby photoshoots.
- Charity Donations: Many charities that support children or families would be delighted to receive handmade hats like these.
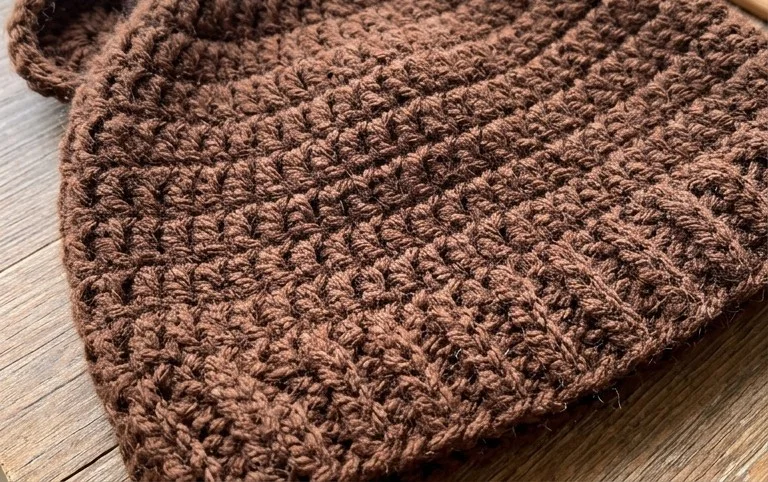
You’ve made a wonderfully cozy bear beanie! This pattern is all about bringing a bit of playful charm to your crochet projects. If you made one in a different color or added some embellishments, share a picture on social media and tag us. It’s always inspiring to see what you create. You could also try using fuzzy yarn for an extra soft bear, or change the nose color for a different look. Don’t forget to check out our other free crochet patterns for more fun ideas.