These little crochet pumpkins are so charming for fall. They have a lovely textured look from the worsted-weight yarn and a simple shape that works up quickly. I like to make a bunch of them and string them together for a garland to hang over the fireplace or along a window sill. They really bring that cozy feeling into the house. This pattern is great for beginners who want to practice basic stitches like single crochet and increases. You’ll also learn how to create a simple shape and how to weave in ends neatly. It’s a satisfying project that doesn’t take too long, meaning you can enjoy your handmade decor throughout the autumn season. You’ll also get tips on how to adapt the pattern for different sizes and colors.
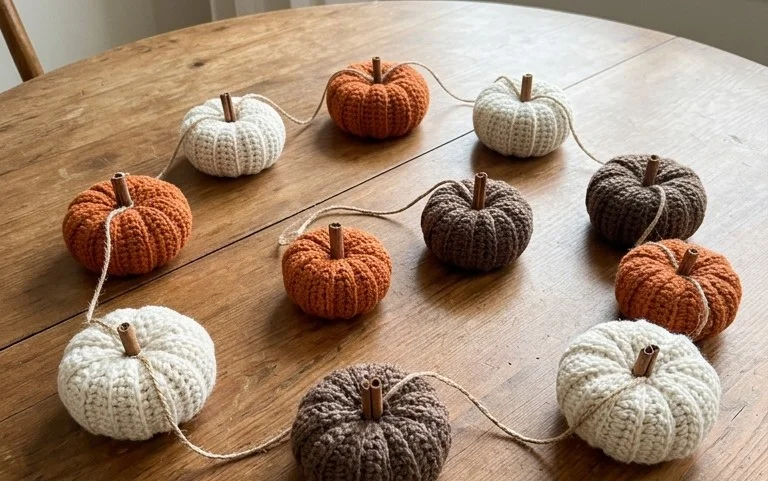
A Cozy Crochet Creation: The Rustic Pumpkin Garland
There’s something undeniably charming about pumpkins in the fall. They bring a sense of warmth and coziness to any space, and this Rustic Crochet Pumpkin Garland pattern is a perfect way to capture that feeling. Imagine stringing these handmade pumpkins along your mantelpiece, draping them over a bookshelf, or even using them to add a festive touch to your front door. They’re quick to make and bring so much handmade cheer.
Yarn and Hook Recommendations
For this garland, you’ll want to reach for worsted-weight yarn. This is a really common yarn weight, often called Aran weight in the UK. It’s a good middle-ground yarn – not too thin, not too bulky – which makes it perfect for creating pumpkins that have a nice texture without being overly stiff or too floppy. Acrylic yarn is a fantastic choice for this project. It’s widely available, comes in a huge range of colors, and it’s easy to wash, which is always a bonus for decorative items. Plus, it’s budget-friendly!
When it comes to your crochet hook, a size H-8 (5.0 mm) hook is typically recommended. This size works well with worsted-weight yarn to create stitches that are neither too tight nor too loose, giving your pumpkins that lovely, slightly squishy form. Of course, yarn and hook size can be a bit of a dance. If your stitches are turning out too loose and you can see too much of the stuffing, try going down a hook size. If they’re too tight and you’re struggling to get your hook through, go up a hook size.
Stitch Techniques You’ll Be Using
This pattern relies on some fundamental crochet stitches that are great for beginners to practice.
- Magic Ring (or Magic Circle): This is how we start each pumpkin, creating a tight, closed center without a hole. It can feel a little fiddly at first, but once you get the hang of it, you’ll use it for all sorts of projects.
- Single Crochet (sc): This is the most basic crochet stitch. It creates a dense fabric, which is ideal for small amigurumi-style items like these pumpkins.
- Half Double Crochet (hdc): This stitch is a bit taller than single crochet, giving your fabric a slightly looser drape.
- Double Crochet (dc): This stitch is even taller, and you’ll use it to create the pumpkin stem.
- Slip Stitch (sl st): This stitch is used for joining rounds and finishing off.
- Increases (inc): This involves working two stitches into the same stitch in the next round. It’s how we gradually widen the pumpkin shape.
- Decreases (e.g., sc2tog): This is the opposite of an increase, where you work two stitches together as one. It’s how we narrow the pumpkin shape to close it off.
Don’t worry if you’re not familiar with all of these. There are countless free video tutorials online that demonstrate each stitch. Searching for “how to crochet a magic ring” or “how to do a single crochet decrease” will bring up loads of helpful visual guides.
Tips for Beginners Tackling This Project
If you’re relatively new to crochet, this pumpkin garland is a fantastic project to build your confidence. Here are a few pointers to make it even smoother:
- Practice those stitches: Before you dive into making pumpkins, grab a scrap piece of yarn and practice the magic ring, single crochet, and increases. Get comfortable with the motions.
- Use a stitch marker: When working in the round, it’s easy to lose track of where the beginning of your round is. Pop a stitch marker in the first stitch of each round.
- Stuffing: You’ll need some toy stuffing (also called poly-fil) to give your pumpkins their shape. Don’t overstuff them too much at first; you can always add a bit more if needed. Aim for a firm but still slightly squishy feel.
- Weave in ends as you go: When you finish a pumpkin, you’ll have yarn tails. Weaving these in securely as you go will save you a lot of time and fiddling at the end.
- Don’t be afraid of mistakes: Everyone makes them! If you realize you’ve made an error a few stitches back, it’s usually easy to gently pull out the yarn (this is called frogging) and correct it.
Customizing Your Pumpkin Garland
The beauty of handmade is that you can make it exactly how you want it.
Colors for Your Pumpkins
While classic orange is traditional, don’t limit yourself! Think about the colors that best suit your home decor.
- Autumnal Hues: Beyond orange, consider deep reds, mustard yellows, burnt sienna, and even a creamy white or pale green for a more muted, natural look.
- Halloween Fun: Go bold with black, purple, and lime green for a spooky twist.
- Farmhouse Chic: Stick to creams, whites, and natural earthy tones.
- Year-Round Decor: Consider pastels for spring or bright colors for summer.
Varying the Size
The pattern likely gives specific stitch counts for a certain size. To make your pumpkins bigger or smaller, you’ll adjust the number of increase rounds.
- Smaller Pumpkins: Work fewer increase rounds. You might even skip an increase round entirely if you want very small pumpkins.
- Larger Pumpkins: Add one or two extra increase rounds. Make sure to maintain the single crochet rounds between the increase rounds to build the height of the pumpkin.
Remember, the stem is usually made separately and attached. You can adjust the length of the stem by adding or removing rows of double crochet. You can also crochet multiple strands of yarn together for a thicker stem.
Caring for Your Crochet Garland
These little pumpkins are pretty low-maintenance.
- Cleaning: If your garland gets a little dusty, a gentle spot clean with a damp cloth is usually enough. For a more thorough clean, you can hand wash the individual pumpkins in cool water with a mild detergent. Squeeze out excess water gently; don’t wring.
- Drying: Lay the pumpkins flat on a clean towel in a well-ventilated area to air dry completely. Avoid direct sunlight, which can fade colors over time.
- Storage: When the season is over, store your garland in a breathable bag or box to protect it from dust and pests. Avoid plastic bags, which can trap moisture.
Project Ideas Beyond a Garland
While the garland is the star, these little crochet pumpkins are versatile!
- Appliqués: Sew them onto a plain tote bag, a tea towel, or a handmade pillow cover for a touch of autumn.
- Stuffed Ornaments: Add a small loop of yarn for hanging and use them as individual tree ornaments.
- Bowl Fillers: Simply place a handful of them in a decorative bowl on your coffee table or dining table.
- Gift Toppers: Tie one onto a wrapped present for a personalized touch.
- Play Food: If made with washable yarn and securely stitched, they can be fun additions to a play kitchen.
This Rustic Crochet Pumpkin Garland is more than just a decoration; it’s a project that brings a little bit of handmade warmth into your home, season after season.
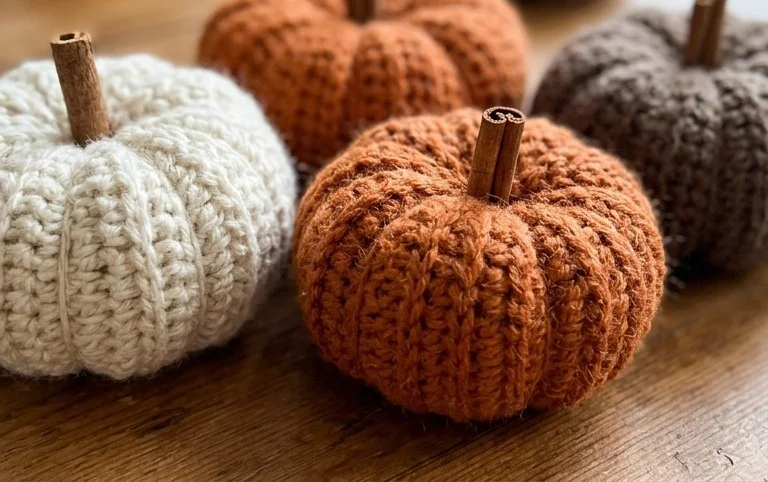
I hope you have fun making this rustic crochet pumpkin garland. It’s a project that adds so much warmth to your home decor for the fall. If you make one, please share a picture on Instagram and tag me @TheKnottedNest so I can see your beautiful work! You could also try using different yarn colors, maybe even some variegated yarn for a unique look, or add a little stem and leaf to each pumpkin. If you enjoyed this free pattern, be sure to check out other crochet patterns here on The Knotted Nest for more seasonal crafting ideas. Happy crocheting!